
Table of Contents
ToggleCramming everything you need into a small kitchen feels like solving a puzzle where the pieces don’t quite fit. But here’s the thing: the L shaped layout is one of the smartest configurations for tight spaces, and it’s not just about jamming cabinets into two walls. When done right, it transforms dead zones into functional workhorses and creates a natural work triangle that makes cooking less like choreography and more like, well, cooking. Whether you’re working with 80 square feet or 120, understanding how to leverage those two perpendicular runs can turn a cramped galley into a surprisingly efficient workspace.
Key Takeaways
- L shaped kitchen designs maximize counter space and storage in small kitchens by efficiently using two perpendicular walls while keeping the room open and uncluttered.
- Create a functional work triangle between sink, stove, and refrigerator measuring 12–21 feet total; position appliances strategically and maintain at least 15–18 inches of counter landing space beside cooktops and sinks.
- Eliminate wasted corner space with lazy Susan cabinets, magic corner pull-outs, or open shelving instead of standard blind cabinets that only provide 50% usable interior space.
- Maximize vertical storage with upper cabinets reaching 42 inches tall, drawer base units, toe-kick drawers, and pull-out pantries to handle limited square footage efficiently.
- Use light colors, large-format tiles, and reflective surfaces (glass, stainless steel, mirrored accents) to visually expand small spaces and ensure adequate task lighting with under-cabinet LED strips.
- Avoid common pitfalls including poor corner solutions, inadequate ventilation, overcrowded upper cabinets, and missing landing zones—prioritize function and proper planning over aesthetic shortcuts.
Why L Shaped Layouts Work Perfectly for Small Kitchens
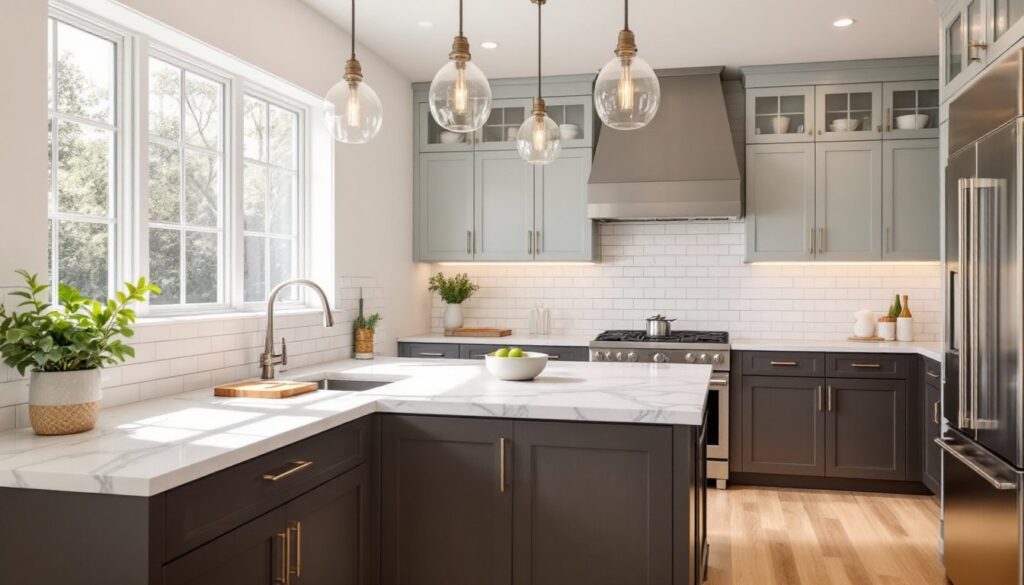
The L shaped kitchen earns its keep in small spaces for one simple reason: it maximizes two walls while leaving the rest of the room open. Unlike galley kitchens that create a corridor, or U-shaped layouts that can feel boxed-in when square footage is tight, the L gives you counter space and storage without crowding the room.
The configuration naturally creates a work triangle, the path between sink, stove, and refrigerator, without forcing you to zigzag across the room. In a compact L, that triangle typically measures between 12 and 21 feet total, which falls right in the sweet spot for efficient movement. You’re not walking marathons to grab the olive oil, but you’re also not bumping into the dishwasher door every time you turn around.
Another advantage: corner real estate. Yes, corners can be tricky, but they’re also opportunities for specialized storage that wouldn’t exist in a straight run. That 90-degree angle where your two cabinet runs meet can house a lazy Susan, a magic corner pull-out, or even a small appliance garage if you plan it right.
L shaped layouts also play well with open floor plans. If your kitchen opens to a dining area or living space, the short leg of the L can serve as a natural divider without requiring a full peninsula or island. For homeowners exploring different layout strategies, the L offers flexibility that’s hard to beat in spaces under 150 square feet.
Essential Design Elements for Compact L Shaped Kitchens
Getting an L shaped kitchen right in a small footprint means sweating the details. Start with upper and lower cabinet depths. Standard base cabinets run 24 inches deep, but in tight quarters, consider 18-inch depth uppers to keep the space from feeling claustrophobic. This is especially true if one leg of your L is shorter than 6 feet, you don’t want cabinets looming over a narrow walkway.
Countertop material matters more than you’d think. A continuous surface across both runs, even if it’s laminate or butcher block, visually ties the space together. If you’re splurging, quartz or solid surface materials handle the corner seam better than tile, which can look choppy at the 90-degree turn.
Pay attention to the landing zones. You need at least 15 inches of counter space next to the cooktop and 18 inches beside the sink for prep work, according to National Kitchen and Bath Association guidelines. In a small L, that often means sacrificing some upper cabinet space for a bit of breathing room, worth it to avoid a cramped feel.
Lighting can’t be an afterthought. Compact L kitchens often suffer from shadowy corners. Install under-cabinet LED strips (aim for 300-500 lumens per foot) to illuminate work surfaces. A single overhead fixture won’t cut it: you’ll need task lighting at the sink and range, plus ambient lighting to keep the whole space from feeling like a cave.
Corner Solutions That Eliminate Wasted Space
Corners are where small L shaped kitchens either win or lose. The standard blind corner cabinet wastes about 50% of its interior, you can reach the front 12 inches, but the back becomes a black hole for forgotten Tupperware.
Instead, consider these proven solutions:
- Lazy Susan cabinets: These rotating shelves (typically 28 to 36 inches in diameter) make everything accessible with a spin. They work best for storing items you use regularly, spices, oils, canned goods.
- Magic corner units: These German-engineered pull-out systems bring the back corner contents to you. Pricey (often $400-600 for hardware alone), but they reclaim nearly all usable space.
- Diagonal corner sinks: Angling the sink across the corner eliminates the dead zone entirely. You’ll need a 36-inch corner base cabinet minimum for this to work without feeling cramped.
- Open shelving at the turn: If upper cabinets meet at the corner, skip the cabinet box altogether and install floating shelves. This keeps sight lines open and prevents that claustrophobic cabinet-corner crunch.
One thing to avoid: corner appliances. Putting a range or refrigerator right at the junction creates awkward door swings and wasted counter space on both sides. Keep appliances at least 12 inches away from the inside corner.
Smart Storage Ideas for L Shaped Small Kitchens
Storage in a small L shaped kitchen is all about vertical space and hidden opportunities. Start by maxing out upper cabinets, if you’ve got 8-foot ceilings, run cabinets to 42 inches tall (or stack 30-inch uppers on 12-inch soffits). That top shelf might need a step stool, but it’s perfect for seasonal items or serving platters you use twice a year.
Drawer base cabinets beat door-and-shelf bases every time in tight kitchens. A 30-inch three-drawer base can organize utensils, cooking tools, and small pots without the dig-and-hunt frustration of a deep shelf. Soft-close hardware is worth the extra $3-5 per drawer to prevent the constant slam in a compact space.
Don’t ignore the toe kick. That 4-inch recess under base cabinets can house a shallow toe-kick drawer for baking sheets, cutting boards, or even pet food bowls. It’s found space that costs about $75-150 per drawer to add during a remodel.
Pull-out pantries are game-changers when you lack a dedicated pantry closet. A 12-inch wide pull-out with five or six shelves can fit between the fridge and wall, holding an impressive amount of dry goods. Design enthusiasts browsing small space solutions consistently rank these as high-value additions.
For the short leg of the L, consider open lower shelving on the end cap. It breaks up the cabinet monotony, provides easy access to cookbooks or frequently used bowls, and keeps that end from feeling like a dead-end hallway.
Pegboard or rail systems on the wall between upper and lower cabinets can hold everything from knives to measuring cups. They’re cheap (under $30 for a 2×4-foot section), customizable, and keep daily-use items off the counter without digging through drawers.
Color Schemes and Materials That Make Small L Kitchens Feel Spacious
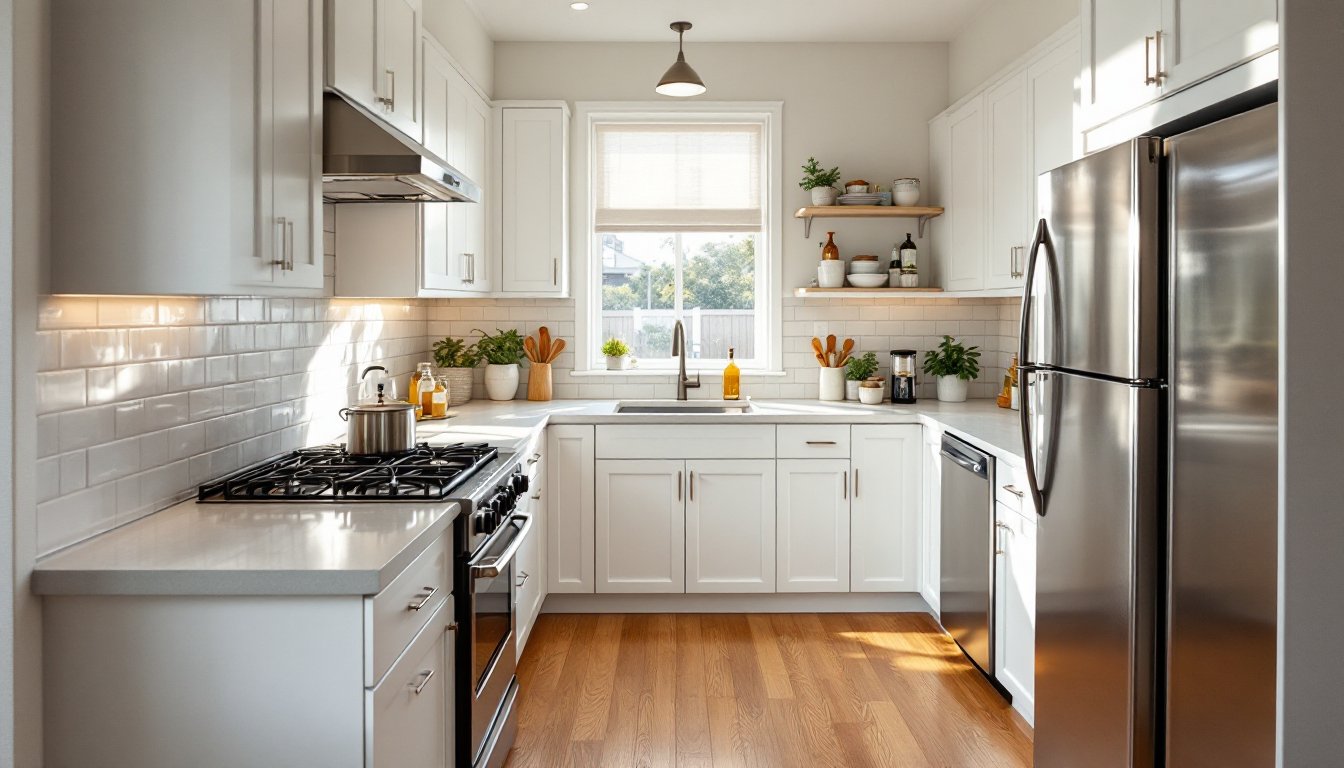
Light colors aren’t just a design cliché, they genuinely expand how a small space feels. White or off-white cabinets reflect more light and push walls outward visually. But all-white can read as cold or sterile: consider warm whites with cream or gray undertones like Benjamin Moore’s Simply White or Sherwin-Williams’ Alabaster.
Two-tone cabinets work well in L layouts. Keep upper cabinets light (white, pale gray, soft sage) and go darker on lowers (charcoal, navy, even black on base cabinets). This grounds the space without shrinking it, and the horizontal color break can make ceilings feel higher.
Backsplash selection affects perceived size. Large-format tiles (like 12×24-inch subway tiles laid horizontally) create fewer grout lines and a cleaner look than traditional 3×6-inch tiles. Glass or glossy finishes bounce light around better than matte surfaces. If you’re drawn to minimalist aesthetics, the clean lines found in Scandinavian design principles can keep a compact L from feeling cluttered.
For flooring, run planks parallel to the longer leg of the L to draw the eye and elongate the space. Avoid busy patterns or high-contrast tiles that chop the floor into visual segments. Light to medium wood tones or large-format porcelain planks (6×48 inches or larger) keep things cohesive.
Countertop pattern matters too. Busy granite with lots of movement can overwhelm a small kitchen. Stick with quartz or solid surface materials in subtle patterns, or go bold with a single dramatic slab if you’re keeping cabinets and walls neutral. Just don’t do all three (cabinets, counters, backsplash) in competing patterns, pick one star.
Reflective surfaces expand space. A stainless steel or light-colored range hood, glass cabinet doors on a few uppers, or even a mirrored backsplash section can add depth without adding square footage.
Layout Variations: Choosing the Right L Configuration for Your Space
Not all L shaped kitchens are created equal. The length of each leg, where you position appliances, and how you handle the corner all change the functionality.
The Classic L features two roughly equal legs, typically 8 to 12 feet each. This works well in square or nearly square rooms and gives you flexibility on appliance placement. Sink usually goes on one leg, range on the other, with the fridge anchoring one end.
The Short-Leg L has one run of 10-12 feet and a shorter 4-6 foot perpendicular section. This fits narrow or rectangular rooms and often places the sink in the short leg with counter space extending past it. The short side can also become a small eat-in counter with 24-inch depth and overhanging countertop for stools.
The Galley-Plus-L starts as a galley (two parallel walls) then adds a short return at one end to form the L. Common in older homes where a wall was removed to open the kitchen to a dining room. The short return often houses the fridge and creates a subtle separation from the adjacent room. Homeowners considering a galley transformation sometimes land on this hybrid as a middle ground.
The L with Peninsula extends one leg beyond the wall to create a partial fourth side. This works if you’ve got at least 9 feet of clearance to avoid bottlenecking traffic. The peninsula can house the cooktop (requires downdraft or overhead ventilation), add seating, or just provide extra counter space. Just make sure you maintain at least 36 inches of walkway clearance on the open side, 42 inches is better if two people cook together.
Appliance positioning follows the same rules regardless of configuration: avoid putting the refrigerator at the inside corner (wastes landing space), keep the dishwasher within 36 inches of the sink (easier plumbing, shorter distance to carry dirty dishes), and allow 15 inches of counter on at least one side of the cooktop for hot pans.
Common Mistakes to Avoid When Designing a Small L Shaped Kitchen
Skimping on the corner solution is mistake number one. Homeowners install a standard blind corner cabinet to save $200-400, then spend the next decade frustrated by wasted space. If budget’s tight, at least install a pull-out shelf in the lower corner cabinet or go with open shelving instead of a useless box.
Ignoring the work triangle happens when you prioritize aesthetics over function. If your sink, stove, and fridge form a triangle with sides longer than 9 feet total, you’re doing laps while cooking. Measure it out before finalizing the layout, this is basic ergonomics, not optional.
Overcrowding with upper cabinets makes a small kitchen feel like a galley on a submarine. If one leg of your L is under 6 feet, consider skipping uppers on part of it or using open shelving. You need visual breathing room, especially near the corner turn.
Choosing the wrong corner sink seems like a space-saver but often backfires. A corner sink needs a corner sink base cabinet (not a standard base modified on-site), proper diagonal placement, and usually custom countertop fabrication. The plumbing can also be tricky. If your plumber hasn’t done several corner sinks, expect complications. It can work beautifully, just don’t DIY it unless you’ve got solid cabinet and plumbing experience.
Inadequate lighting already got mentioned, but it’s worth repeating because it’s such a common failure point. One ceiling fixture and maybe an over-the-range light won’t cut it. Budget at least $300-500 for proper under-cabinet lighting, and install a dimmer on overhead fixtures so you can adjust ambiance.
Forgetting landing space next to appliances creates constant annoyance. You need somewhere to set down the pot you just pulled from the stove or the grocery bags on their way to the fridge. Designers at Remodelista consistently emphasize counter landing zones as non-negotiable, even in tight kitchens, 15 inches minimum beside any appliance that opens or produces heat.
Matching everything to a single finish or color makes a small space feel flat and one-dimensional. Mix in at least two finishes (brushed nickel and matte black, or brass and stainless), vary cabinet depths by even 2 inches between uppers and specialized cabinets, and introduce texture through backsplash, open shelving, or a different countertop edge profile. Subtle variety adds depth without clutter.
Finally, ignoring ventilation because space is tight leads to greasy cabinets and lingering cooking smells. If you can’t fit a standard range hood, at least install a microwave with a 300+ CFM exhaust or a downdraft system. Recirculating hoods are better than nothing but not by much, try for ducted ventilation whenever possible.