
Table of Contents
ToggleWhen an Electrolux refrigerator starts acting up, warm compartments, pooling water, or strange noises, the problem often boils down to a single failed component. The good news? Many common refrigerator parts are DIY-friendly replacements that don’t require a service call. Homeowners can save hundreds of dollars by ordering the right part and installing it themselves, but success depends on accurate identification, proper tools, and knowing when a repair crosses into professional territory. This guide walks through the most frequently replaced Electrolux parts, sourcing genuine components, and tackling repairs with confidence.
Key Takeaways
- Common Electrolux refrigerator parts like door gaskets, water inlet valves, and evaporator fan motors are DIY-replaceable, saving homeowners $150–$250 in service call fees.
- Locate your refrigerator’s model number on the fresh food compartment sidewall to accurately cross-reference Electrolux parts and avoid ordering incompatible components.
- Always unplug your refrigerator and shut off the water supply before starting repairs, and never attempt refrigerant system work without EPA Section 608 certification.
- Purchase genuine OEM Electrolux refrigerator parts through the official Electrolux parts store or authorized retailers to ensure proper fit, longevity, and warranty protection.
- DIY repairs for gaskets, valves, and fan motors typically take 30 minutes to 2 hours, but professional help is essential for sealed refrigerant systems, control boards, and complex structural damage.
Common Electrolux Refrigerator Parts That Need Replacement
Certain components in Electrolux refrigerators wear out faster than others due to constant cycling, temperature fluctuations, and mechanical stress. Understanding which parts fail most often helps homeowners diagnose issues quickly.
Door gaskets (also called door seals) crack or lose elasticity after 3-5 years, allowing warm air infiltration and forcing the compressor to overwork. A simple visual check: close the door on a dollar bill and try pulling it out. If it slides easily, the gasket needs replacement.
Water inlet valves control water flow to ice makers and dispensers. When they fail, often due to mineral buildup or electrical failure, ice production stops or water leaks onto the floor. These valves typically mount at the back lower panel and connect to the household water line via a ¼-inch compression fitting.
Evaporator fan motors circulate cold air from the freezer to the fresh food compartment. A failing motor produces grinding noises or stops entirely, leading to uneven cooling. Most Electrolux models position this fan behind the rear freezer wall panel.
Thermistors (temperature sensors) send data to the control board. A faulty thermistor causes erratic temperature swings, freezing fresh food, or prematurely spoiling groceries. Testing requires a multimeter to check resistance values against the service manual’s specifications.
Defrost heaters prevent ice buildup on evaporator coils. When they burn out, frost accumulates and blocks airflow, reducing cooling efficiency. Visible frost on the back freezer wall often signals this failure.
How to Identify the Right Parts for Your Electrolux Model
Ordering the wrong part wastes time and money. Electrolux manufactures dozens of refrigerator lines, including French door, side-by-side, and top-freezer models, and parts often aren’t interchangeable even within the same series.
Start by locating the model number, typically found on a sticker inside the fresh food compartment (along the upper left or right sidewall) or on the left exterior sidewall near the top. The format usually includes letters and numbers, such as EI23BC82SS or FPBS2777RF. Write down the full string, including any suffix letters, those indicate revision changes that affect part compatibility.
Next, reference the serial number on the same label. The serial number indicates manufacturing date and plant location, which can narrow down component variations made during production runs.
Cross-reference these numbers using Electrolux’s online parts lookup tool or third-party diagrams. Enter the model number to view exploded diagrams showing every component with corresponding part numbers. These diagrams are invaluable, they reveal exactly where a part sits within the assembly and list superseding part numbers if the original has been discontinued.
For electrical components (control boards, motors, valves), verify voltage and wattage ratings match the original. Installing a water valve rated for 120V in a unit requiring 110V can cause premature failure or create safety hazards.
Some Electrolux refrigerators sold under different brand names (Frigidaire, for instance, shares parent company heritage) may use identical parts. Verify cross-compatibility through part number databases before ordering.
Where to Buy Genuine Electrolux Refrigerator Parts
Sourcing genuine OEM (Original Equipment Manufacturer) parts ensures proper fit, longevity, and warranty protection. Aftermarket or universal parts may work short-term but often fail prematurely or void remaining manufacturer coverage.
Online Retailers and Manufacturer Direct
Electrolux operates an official parts store at electroluxappliances.com, where homeowners can order directly using model numbers. Shipping typically takes 3-7 business days, and parts carry manufacturer warranties. The site provides installation manuals and diagrams for most components.
AppliancePartsPros.com and RepairClinic.com stock extensive Electrolux inventories with same-day shipping on common items. Both sites offer part identification help via live chat and phone support. Prices run 10-15% lower than manufacturer direct, though warranty terms vary.
Amazon carries many Electrolux parts through authorized resellers. Filter results by “Ships from and sold by Amazon.com” to avoid counterfeit components. Read reviews carefully, several listings bundle parts with installation videos, which can be helpful for first-time DIYers.
Local appliance parts wholesalers often beat online prices on bulky items (door assemblies, compressors) where shipping costs add up. Call ahead with the part number to confirm availability. Many kitchen appliance specialists recommend building relationships with local suppliers for future repairs and professional advice.
Avoid salvage yards or used parts for critical electrical components (control boards, compressors, defrost systems). The savings rarely justify the risk of installing a part with unknown service history.
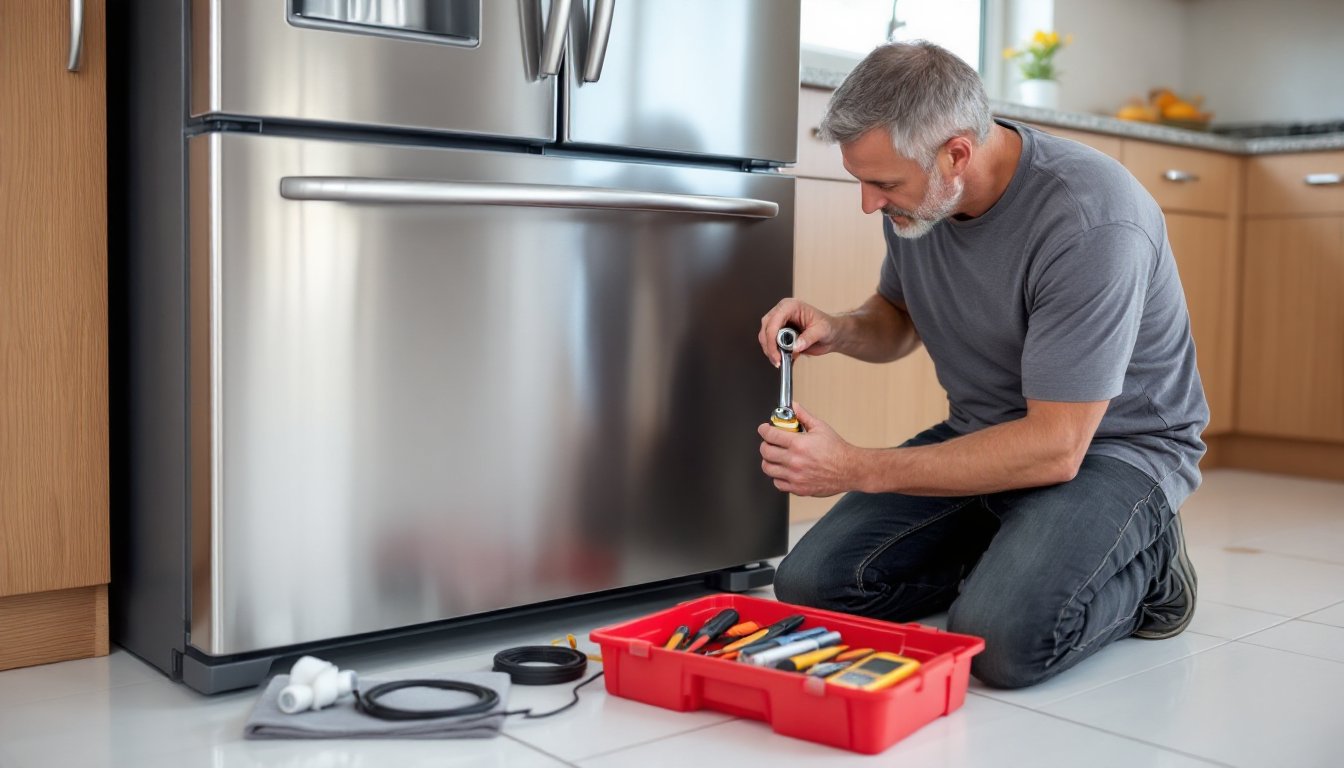
Essential Tools and Safety Tips for DIY Refrigerator Repairs
Most refrigerator repairs require basic hand tools and strict adherence to electrical safety protocols. Skipping safety steps or working with improper tools leads to injury, property damage, or expensive mistakes.
Tools for common repairs:
- Nut driver set (¼-inch and 5/16-inch), removing panels and mounting screws
- Phillips and flat-head screwdrivers, various screw heads throughout appliance
- Needle-nose pliers, disconnecting wire harnesses and clamps
- Multimeter, testing voltage, continuity, and resistance on electrical parts
- Adjustable wrench, water line connections and compression fittings
- Putty knife, gently prying panel clips without cracking plastic
Safety first: Always unplug the refrigerator before starting work. If the outlet is inaccessible, shut off the dedicated circuit breaker. Refrigerators draw 5-8 amps during normal operation, but compressor startup can spike to 15 amps, enough to cause serious shock.
Wear safety glasses when working behind or beneath the unit, where dust, debris, and sharp edges accumulate. Work gloves protect hands from sheet metal edges and refrigerant lines.
For water line work, turn off the household water supply valve (usually located under the sink or behind the fridge) and place towels beneath connections to catch residual water. Keep a bucket handy when disconnecting the inlet valve.
Never attempt refrigerant system repairs (compressor, sealed system, refrigerant lines). Federal EPA regulations require Section 608 certification to handle refrigerants, and improper work can release harmful gases or render the appliance unrepairable. Those jobs belong to licensed HVAC technicians.
Work in a well-ventilated area. Moving a refrigerator releases accumulated dust and mold from the condenser coils and drip pan, both respiratory irritants. A dust mask (N95 or better) prevents inhalation during cleaning and disassembly.
Step-by-Step Guide to Replacing Common Electrolux Parts
Tackling a refrigerator repair becomes manageable when broken into clear steps. The following procedures cover the most common DIY-friendly replacements.
Replacing a door gasket:
- Order the correct gasket using the model number, universal gaskets rarely seal properly.
- Let the new gasket sit in warm water for 5-10 minutes to soften, making installation easier.
- Start at a top corner, pulling the old gasket from the retainer groove (it’s usually held by friction, not adhesive).
- Clean the retainer channel with warm soapy water and dry completely.
- Press the new gasket into the groove, starting at the top center and working outward and downward. Ensure corners sit flat without puckering.
- Close the door and check the seal, adjust any loose sections by gently heating with a hairdryer and smoothing into place.
Swapping a water inlet valve:
- Unplug the refrigerator and shut off the water supply.
- Pull the fridge away from the wall to access the rear lower panel (usually 3-4 screws).
- Disconnect the water line from the valve using an adjustable wrench, expect residual water to drip.
- Unplug the wire harness from the valve (press the release tab and pull straight off).
- Remove mounting screws and extract the old valve.
- Install the new valve in reverse order, hand-tightening the water line first, then snugging with a wrench (don’t overtighten compression fittings, they’ll leak).
- Restore power and water, checking for leaks over 10 minutes.
Changing an evaporator fan motor:
- Empty the freezer and unplug the unit.
- Remove shelves and the rear freezer panel (typically 4-6 screws along the edges).
- Disconnect the wire harness from the fan motor.
- Remove the fan blade from the motor shaft (some use a set screw, others pull straight off).
- Unbolt the motor from its mounting bracket (usually 2 screws).
- Install the new motor, reattach the blade (ensure it spins freely without wobble), and reassemble the panel.
Many DIY repair guides recommend photographing wire connections and panel positions before disassembly, helpful when reassembling complex sections.
When to Call a Professional vs. DIY Repair
Some refrigerator repairs fall comfortably within DIY skill sets, while others demand professional expertise, specialized equipment, or licensing. Knowing the difference prevents wasted effort, injury, and costlier secondary damage.
DIY-friendly repairs include door gaskets, water inlet valves, evaporator fan motors, thermistors, defrost heaters, light bulbs, ice maker assemblies, and door shelves. These components involve basic electrical connections, accessible mounting points, and minimal disassembly. Total repair time typically runs 30 minutes to 2 hours.
Call a professional for:
- Sealed refrigerant system work, compressor replacement, refrigerant leaks, or condenser repairs require EPA certification and specialized gauges. Attempting these repairs without credentials is illegal and dangerous.
- Control board failures on high-end models, French door and smart refrigerators use complex boards ($200-$400 parts alone) with sensitive programming. Incorrect installation can brick the unit.
- Structural damage, cracked cabinet liners, bent frames, or damaged door hinges often require fabrication skills and specialty parts.
- Water line installation through cabinetry or floors, running new supply lines through walls or under flooring is plumbing work, sometimes requiring permits.
Cost comparison: A service call averages $150-$250 for diagnosis, plus parts and labor. A straightforward fan motor replacement might total $300-$400 installed. Homeowners doing the same repair spend $80-$120 on the part and 1-2 hours of time.
Appliance repair specialists often recommend DIY for parts under $150 and professional service for anything involving refrigerant, complex electronics, or warranty-covered repairs (self-repair can void coverage). When in doubt, many technicians offer phone consultations for $25-$50, diagnosing the issue and advising whether it’s a reasonable DIY project.
If the refrigerator is over 10 years old and requires major component replacement (compressor, sealed system), compare repair costs against replacement. Modern Energy Star models often pay for themselves in lower electricity bills within 5-7 years.