
Table of Contents
ToggleHome security isn’t just about locks anymore. HD security cameras have become the front line of protection for homeowners, offering crystal-clear footage that can identify faces, license plates, and package thieves with enough detail to matter when you need it most. But not all HD cameras deliver the same performance, and choosing the wrong system can leave you with blurry footage and buyer’s remorse. This guide walks through what actually makes a security camera high-definition, which features justify the price tag, and how to install and configure a system that works for your property without hiring a security contractor.
Key Takeaways
- HD security cameras with 1080p resolution provide the practical baseline for identifying faces and license plates, while 2K and 4K options offer better digital zoom but demand more storage and bandwidth.
- Sensor size, lens quality, and frame rate matter as much as pixel count—opt for cameras with 1/2.8-inch or larger sensors and 30 fps for smooth motion capture and reliable footage.
- Strategic placement at entry points (7–9 feet high), driveways, side gates, and blind spots maximizes coverage and deters burglars more effectively than randomly positioned cameras.
- Wired systems deliver reliable, interference-free recording for multi-camera setups, while wireless cameras suit small installations (1–3 cameras) in areas with strong Wi-Fi and accessible mounting.
- Choose local NVR storage for privacy and no ongoing fees, cloud backup for theft protection, or hybrid systems that record locally while uploading critical events for balanced security.
What Makes a Security Camera ‘HD’ and Why It Matters
HD (high-definition) technically means any resolution of 720p or higher, that’s 1280×720 pixels minimum. Most cameras sold today hit 1080p (1920×1080), which is the practical baseline for useful footage. Anything less and you’ll struggle to read a license plate or identify a face beyond ten feet.
Many manufacturers now push 2K (2560×1440) and 4K (3840×2160) cameras, which offer sharper images and better digital zoom. That extra resolution pays off when you need to crop into footage to see details like a door handle being jimmied or a person’s clothing. But, higher resolution demands more storage space and stronger Wi-Fi bandwidth for wireless models.
The sensor size and lens quality matter as much as pixel count. A cheap 4K camera with a small sensor and plastic lens will deliver worse images than a well-built 1080p camera with a larger sensor and glass optics. Look for cameras with 1/2.8-inch or larger sensors and check sample footage reviews before buying.
Frame rate also affects usability. 15 frames per second (fps) is acceptable for static monitoring, but 30 fps provides smoother playback and better chances of catching fast motion like someone running. Some cameras drop to lower frame rates at night to improve light sensitivity, which is a reasonable trade-off.
Key Features to Look for in an HD Security Camera
Beyond resolution, several features separate functional cameras from ones that’ll frustrate you within a week.
Field of view (FOV) determines how much area one camera covers. A 110–130-degree FOV works well for most exterior corners and doorways. Narrower views (90 degrees) suit focused monitoring like driveways, while ultra-wide lenses (150+ degrees) introduce fisheye distortion that can warp faces and plates at the edges.
Motion detection zones let you ignore tree branches and passing cars while alerting you to movement near doors or gates. Better systems use person detection or AI object recognition to reduce false alerts from animals, shadows, or headlights. These features rely on onboard processing or cloud analysis, check whether there’s a subscription fee.
Two-way audio turns a camera into an intercom. Useful for telling a delivery driver where to leave a package or scaring off someone casing your garage. Audio quality varies wildly: read reviews to avoid models with garbled speakers.
Weather resistance is non-negotiable for outdoor cameras. Look for an IP65 rating minimum, IP66 or IP67 is better. That first digit (6) means dust-tight: the second (5–7) indicates protection from water jets or temporary immersion. Cameras rated lower than IP65 will fail in heavy rain or snow.
Power over Ethernet (PoE) capability is a bonus for wired setups. It delivers both power and data through a single Cat5e or Cat6 cable, eliminating the need for nearby outlets and reducing install complexity.
Night Vision and Low-Light Performance
Infrared (IR) LEDs are standard for night vision, illuminating the scene with invisible light the camera’s sensor picks up. Most cameras advertise night vision range, 30 feet is typical, 50+ feet is good, but real-world performance depends on ambient light and whether you have porch lights or streetlights nearby.
Starlight or color night vision cameras use larger sensors and advanced processing to capture low-light color footage without IR. They cost more but deliver usable color images in near-dark conditions, which helps identify clothing and vehicle colors. Some models include a spotlight that triggers on motion, switching from IR to full color and potentially deterring intruders.
Check sample night footage before buying. IR performance varies dramatically. Poor cameras wash out faces with overexposed hotspots or fail to illuminate beyond fifteen feet even though advertised specs.
Best Placement Locations for HD Security Cameras Around Your Home
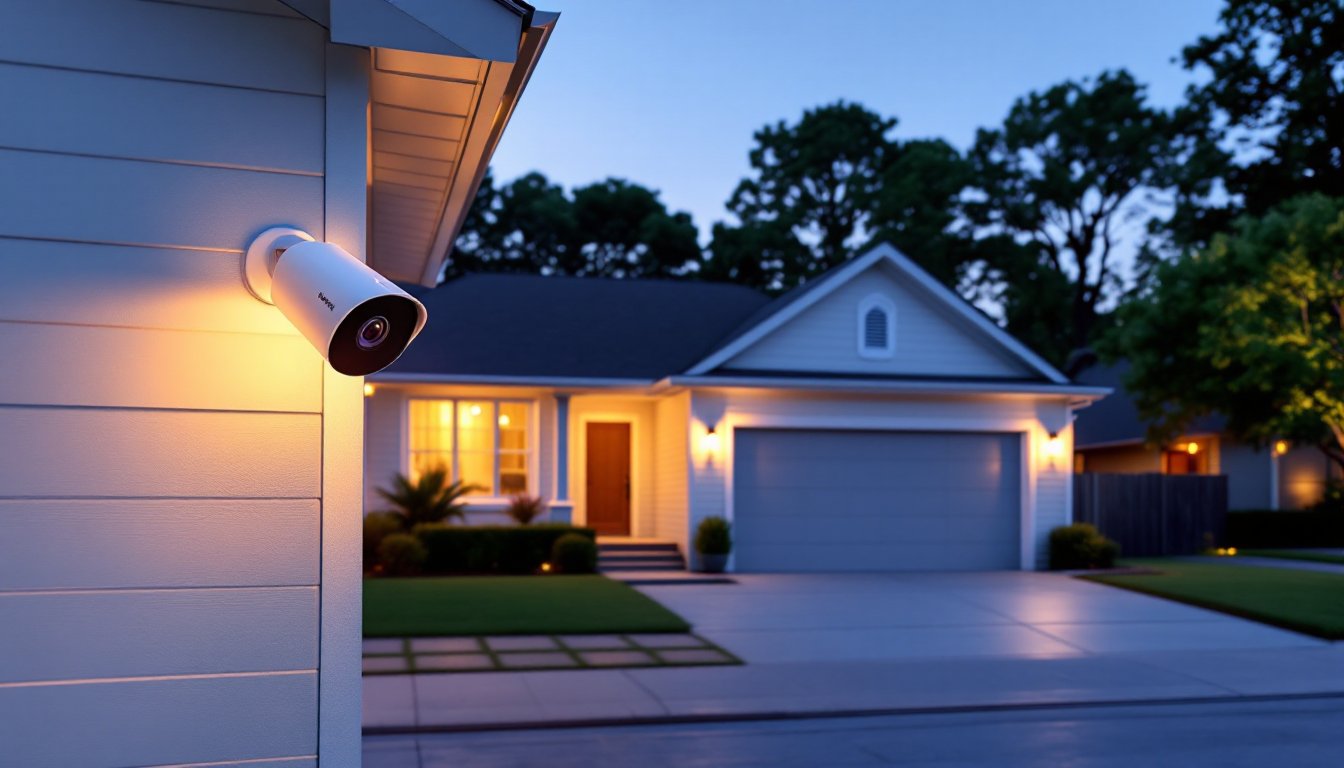
Smart placement multiplies camera effectiveness. Start with entry points: front door, back door, and garage doors. Mount cameras 7–9 feet high, low enough for facial detail, high enough to avoid tampering. Angle them slightly downward to capture faces, not the tops of heads.
Driveway and street-facing angles should focus on license plate capture if vehicle ID matters to you. Standard cameras struggle with plate glare from headlights, so dedicated license plate recognition (LPR) cameras with narrow FOV and adjustable shutter speeds work better for this specific task.
Side gates, basement windows, and other secondary access points often get ignored but are common break-in routes. Even a basic 1080p camera here acts as a deterrent. Burglars avoid homes with visible cameras.
Backyard and patio coverage protects valuables like grills, bikes, and tools. If you have a pool or shed, place a camera to cover access paths. For large yards, multiple cameras with overlapping coverage eliminate blind spots.
Avoid aiming cameras directly at the sun or bright lights, lens flare and backlight will ruin footage. Test the view during different times of day before permanently mounting. If wired cameras are in play, plan wire runs through attics, soffits, or conduit to keep them protected and hidden.
Wired vs. Wireless HD Security Cameras: Which Is Right for You?
Wired cameras connect via Ethernet cable (Cat5e or Cat6) or coaxial cable for older analog HD systems (HD-TVI, HD-CVI). They deliver reliable, interference-free video and don’t depend on Wi-Fi signal strength. PoE systems simplify installation since one cable handles power and data, running back to a central network video recorder (NVR) or PoE switch.
The downside? Installation takes more effort. You’ll need to fish cables through walls, attics, or conduit runs. That’s manageable for new construction or unfinished spaces but challenging in finished homes without crawlspace access. Budget a full day or more for a four-camera wired system if you’re doing it yourself.
Wireless cameras connect via Wi-Fi, which makes installation fast, mount, power, sync to your app, done. Battery-powered wireless models eliminate even the power cable, running on rechargeable batteries for 3–6 months depending on activity and settings. Smart home enthusiasts often favor wireless systems for flexibility, especially for rental properties or temporary monitoring.
The trade-offs: Wi-Fi cameras depend on strong signal where they’re mounted. A camera too far from your router or blocked by thick walls will drop connection, miss events, or deliver choppy footage. Wi-Fi extenders or mesh networks solve most issues but add cost and complexity. Battery models also require regular recharging, which becomes tedious if cameras are mounted high or in hard-to-reach spots.
Wired systems win for reliability and multi-camera setups. Wireless works best for 1–3 cameras in areas with solid Wi-Fi and accessible mounting points. If you’re covering more than four zones or need 24/7 recording, go wired.
DIY Installation Tips for Homeowners
Start by testing camera views before drilling. Use painter’s tape and a temporary mount or ladder to preview the angle and coverage. Adjust height and direction until you’re satisfied, then mark drill holes.
For wired cameras, plan your cable route first. Attics and crawlspaces are ideal for hidden runs. Use a fish tape or pull rod to route cables through walls. Drill through top plates or rim joists with a 7/8-inch spade bit, large enough for connectors to pass through. Seal exterior penetrations with silicone caulk to prevent water intrusion and pest entry.
Use a stud finder to locate framing before mounting. Cameras should anchor into wood studs, joists, or blocking with #10 wood screws or into masonry with concrete anchors rated for outdoor use. Avoid drywall-only mounts for exterior cameras, wind and weight will pull them loose.
Wear safety glasses when drilling overhead or into masonry. If running cables in an attic, avoid stepping between joists, walk on framing or lay down plywood to prevent falling through the ceiling.
For wireless cameras, mounting is simpler but placement is pickier. Use your phone to check Wi-Fi signal strength at the mount location before installing. Most camera apps include a signal strength indicator. Aim for at least three bars or -60 dBm or better.
Junction boxes or camera housings should be weatherproof if outdoors. Route cables into the box through a bottom knockout so water doesn’t run down the cable into connections. Drip loops, a small sag in the cable just before it enters the box, also prevent water tracking.
If your system includes an NVR or DVR, place it indoors in a ventilated space. These recorders generate heat and need airflow. Connect it to a UPS (uninterruptible power supply) so recording continues during brief power outages.
Storage Options: Cloud vs. Local Recording
Local recording stores footage on a physical device, either an NVR/DVR hard drive or a microSD card in the camera itself. Hard drives range from 1 TB to 8 TB or more. A 2 TB drive holds roughly two weeks of continuous 1080p footage from four cameras, though motion-only recording stretches that significantly.
Local storage gives you full control, no monthly fees, no internet dependency, and footage stays private. The risk is hardware failure or theft. If someone steals the NVR or the camera with the SD card, your footage goes with it. Redundancy (backup to a second drive or NAS) mitigates this but adds cost.
Cloud storage uploads footage to remote servers. Most manufacturers offer tiered plans, free tiers with limited history (24–48 hours) and paid plans with 7, 30, or 60+ days of rolling storage. Monthly costs typically run $3–10 per camera, which stacks up for multi-camera systems.
Cloud storage protects against local theft or damage. Even if the camera is destroyed, footage already uploaded remains accessible. Many cloud-based systems reviewed recently offer AI features like person/package/vehicle detection as part of the subscription.
The downsides: ongoing cost, dependency on internet upload speed, and privacy concerns. Footage sits on a third-party server, subject to their security practices and potential subpoenas. Read the provider’s terms carefully.
Hybrid systems record locally and back up important clips to the cloud. This balances cost, privacy, and redundancy. Some systems let you choose which events upload, motion alerts, person detection, or specific zones, reducing cloud bandwidth and storage use.
For most DIYers, a local NVR with 2–4 TB of storage handles daily needs. Add cloud backup for critical cameras (front door, driveway) if budget allows. Avoid systems that force cloud-only storage with no local option, they lock you into subscriptions and fail completely if your internet drops.