
Table of Contents
ToggleA KitchenAid stand mixer that once purred through thick bread dough now whines under pressure. The motor sounds louder than usual, or worse, there’s a burnt smell creeping from the housing. These aren’t signs of old age or poor quality. They’re red flags that the grease inside the gearbox has dried out, contaminated, or broken down. Most home bakers don’t realize their mixer requires periodic grease replacement, but this simple maintenance task can add decades to the machine’s working life. This guide walks through everything needed to identify grease problems, select the correct lubricant, and perform a full grease replacement.
Key Takeaways
- KitchenAid mixer grease degrades over time due to heat, moisture, and metal wear, causing increased friction, noise, and potential motor failure—regular replacement every 3–7 years prevents costly repairs.
- Unusual noise, excessive motor heat, grease leakage, reduced mixing performance, and burning smells are clear indicators your KitchenAid mixer needs fresh grease maintenance.
- Select NSF H-1 certified, food-grade grease with NLGI Grade 2 consistency, such as white lithium complex or synthetic formulas; avoid silicone and automotive greases incompatible with stand mixer specifications.
- Proper grease application requires coating gear teeth and bearing surfaces with a thin layer while keeping the housing approximately one-third full—overfilling causes leaks, while underfilling provides inadequate protection.
- Matching speed to task, allowing cooling breaks between batches, and maintaining a service log help extend your mixer’s lifespan to 20–30 years of reliable performance.
- If disassembly feels overwhelming, professional appliance repair shops can complete KitchenAid mixer grease replacement for $50–$100, ensuring proper service without DIY risk.
What Is KitchenAid Mixer Grease and Why Does It Matter?
KitchenAid stand mixers rely on a planetary gear system housed in the mixing head. This arrangement uses a central drive gear surrounded by several smaller gears that rotate around it, allowing the beater to move both on its own axis and around the bowl. Those gears operate under significant load, especially when kneading stiff dough or mixing dense batters.
The grease inside the gearbox serves three critical functions: it reduces friction between metal surfaces, dissipates heat generated during operation, and prevents metal-on-metal wear that leads to gear failure. Factory-installed grease is typically a food-grade, non-separating lubricant formulated to withstand both high torque and temperature fluctuations.
Over time, grease degrades. Heat cycles cause it to break down chemically, losing viscosity. Moisture can infiltrate through seals, creating a watery emulsion. Tiny metal particles from normal gear wear contaminate the lubricant, turning it abrasive rather than protective. When grease fails, friction increases, motor strain rises, and internal components wear at an accelerated rate. Left unchecked, this can lead to stripped gears, burned-out motors, or a seized transmission, all expensive repairs that dwarf the cost of a grease change.
Signs Your KitchenAid Mixer Needs New Grease
Most mixers show clear symptoms when grease maintenance is overdue. Catching these early prevents catastrophic failure.
Unusual noise is the most common indicator. A healthy mixer runs with a low mechanical hum. When grease breaks down, users hear grinding, clicking, or high-pitched whining, especially under load. The sound often changes pitch as the mixer works through thick ingredients.
Excessive heat from the motor housing signals increased friction. All motors generate warmth, but if the body becomes uncomfortable to touch after 10–15 minutes of moderate use, the gearbox is working harder than designed.
Visible grease leakage around the mixing head or dripping onto the bowl indicates either overfilling from a previous service or seal failure allowing grease to escape. Black, separated, or crusty grease visible through seams confirms degradation.
Reduced mixing performance shows up as the beater failing to reach all areas of the bowl, inconsistent rotation speed, or the motor bogging down with recipes that previously posed no challenge. This often means increased internal resistance from dried or contaminated lubricant.
Burning smell is a late-stage warning. It can indicate grease cooking onto hot metal surfaces or, worse, motor windings overheating due to excessive load. At this point, damage may already be underway.
For home bakers who use their mixer regularly, several times per week, grease replacement should happen every 3-5 years. Light users can extend this to 5-7 years. Commercial or heavy-duty use may require annual service.
Choosing the Right Grease for Your KitchenAid Mixer
Not all lubricants work for mixer gearboxes. The wrong grease can separate, melt, or gum up under operating conditions.
Food-grade grease is non-negotiable. Even though the gearbox is sealed, the proximity to food preparation means using a lubricant rated for incidental food contact. Look for products meeting NSF H-1 certification or FDA 21 CFR 178.3570 compliance.
Consistency and base matter. KitchenAid factory grease is a white lithium complex formula with an NLGI Grade 2 consistency, thick enough to stay in place but fluid enough to coat moving parts. Alternatives include synthetic greases formulated for high-load, low-speed applications. Avoid general-purpose automotive greases: they’re not designed for the sustained torque and speed variations of a stand mixer.
Many users turn to Benzomatic food-grade grease or Super Lube synthetic grease with PTFE, both widely available and compatible with KitchenAid specifications. For those seeking original equipment, KitchenAid sells replacement grease in 4-ounce tubes, though it’s pricier than aftermarket options.
Avoid silicone-based greases. While food-safe, they don’t provide adequate protection under the cyclical loads mixers experience. Similarly, marine greases and general machinery lubricants often contain additives incompatible with the mixer’s soft metal gears and seals.
When selecting grease, consider the mixer’s age and use. Older models with brass gears benefit from traditional lithium-based formulas. Newer units with hardened steel components can handle synthetic options that offer better temperature stability. Reading reviews from other mixer owners on platforms covering appliance maintenance guides can provide real-world performance insights.
How to Replace KitchenAid Mixer Grease Step-by-Step
Replacing mixer grease is a mechanical task, not a quick fix. Plan for 2-3 hours on a first attempt. This is not structural work requiring permits, but it does involve complete disassembly of the mixing head.
Tools and Materials You’ll Need
Gather everything before starting to avoid mid-project supply runs.
Tools:
- Flathead and Phillips screwdrivers (multiple sizes)
- Hex key set (metric and SAE)
- Adjustable wrench or socket set
- Needle-nose pliers
- Rubber mallet (optional, for stubborn parts)
- Clean rags or shop towels
- Small containers for organizing screws and parts
- Digital camera or smartphone (for reference photos during disassembly)
Materials:
- 4 ounces food-grade grease (about half will be used)
- Degreaser or mineral spirits for cleaning old grease
- Paper towels
- Latex or nitrile gloves
- Small brush (an old toothbrush works)
Safety gear: Work gloves protect against sharp edges inside the housing. Safety glasses prevent grease splatter from reaching eyes during cleaning.
Disassembly and Grease Replacement Process
1. Preparation and access
Unplug the mixer and remove the bowl, beater, and any attachments. Tilt the motor head back to its locked position. Lay the mixer on its back on a padded surface, old towels work well to prevent scratching.
Remove the rear housing cover by unscrewing the screws around its perimeter (typically 4-6 screws). Some models use a combination of Phillips and flathead screws. Take a photo of screw locations before removal: they’re often different lengths.
2. Accessing the gearbox
Lift off the rear cover to expose the planetary assembly. The speed control plate (the metal disc with the speed adjustment knob attached) may need removal on some models. This typically involves removing a retaining clip or set screw.
Locate the planetary housing, the large circular chamber where gears reside. On most models, this is secured by a large retaining ring that unscrews counterclockwise. Use an adjustable wrench on the ring’s notches. Some rings are tight: a rubber mallet tap on the wrench handle can break them loose.
3. Gear removal and cleaning
Carefully lift out the planetary assembly. Inside you’ll find the drive gear (center), pinion gears (usually three or four smaller gears), and the ring gear (the outer toothed ring). Detailed steps for disassembly vary by model, so taking progressive photos is critical for reassembly.
Wipe all old grease from every component using rags and degreaser. Inspect gears for wear, teeth should be smooth and uniform. Pitting, chips, or metal shavings indicate damage requiring replacement parts. The housing interior also needs thorough cleaning: old grease accumulates in corners and threads.
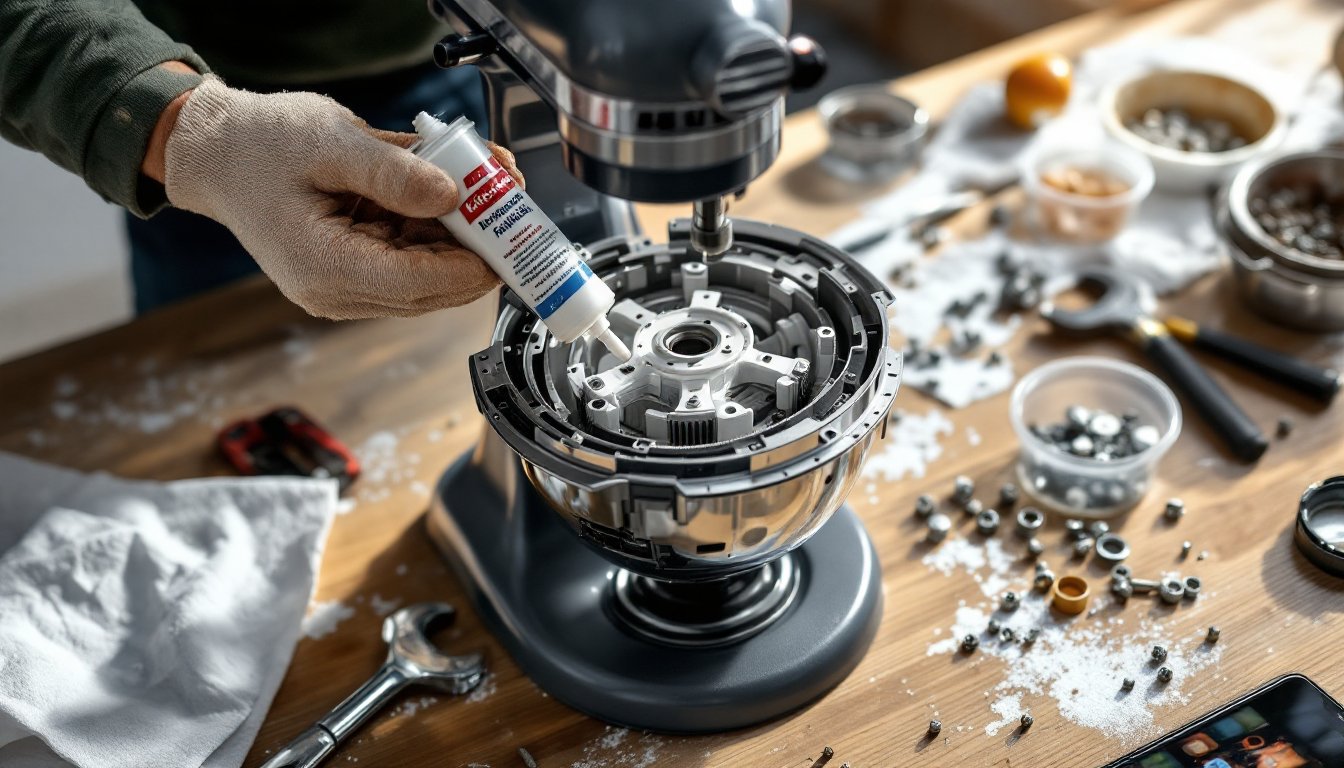
4. Grease application
This is where most DIYers make mistakes. Too much grease causes leaks and churning losses: too little provides inadequate protection.
Apply grease to gear teeth and bearing surfaces, not the housing walls. Coat each gear with a thin, even layer, about 1/16-inch thick on all tooth surfaces. Place a small dollop (roughly a tablespoon) in the center of the planetary housing where the drive gear sits.
Total grease used should be approximately 2-3 ounces for most models. The housing should be about one-third full when reassembled. Overfilling leads to grease being forced out through seals during operation.
5. Reassembly
Reinstall gears in reverse order of removal, using photos as reference. Ensure pinion gears mesh properly with both the drive gear and ring gear, they should rotate smoothly by hand. Reinstall the retaining ring, tightening firmly but not over-torquing (which can strip threads).
Replace the speed control plate and rear housing cover, confirming all screws return to original positions. Before flipping the mixer upright, manually rotate the drive shaft several times to distribute grease and verify smooth operation.
6. Break-in and testing
Run the mixer empty on speed 1 for 2-3 minutes. This works grease into all contact surfaces. Check for leaks around seams. Next, run it through all speed settings for 30 seconds each, listening for abnormal sounds.
Finally, test with a moderate load, a batch of cookie dough or similar. The mixer should operate quietly with no excessive heat buildup. Some warmth is normal during the first few uses as grease fully distributes.
For those uncomfortable with mechanical disassembly, many local appliance repair shops offer grease service for $50-$100, depending on region. Resources like DIY repair tutorials can provide model-specific guidance for challenging steps.
Preventive Maintenance Tips to Extend Your Mixer’s Lifespan
Beyond grease replacement, simple habits prevent premature wear.
Match speed to task. Don’t start the mixer on high with stiff dough already in the bowl. Begin on low to engage ingredients, then increase speed. This reduces shock loads on gears.
Avoid continuous heavy-duty operation. If making multiple batches of bread dough, let the mixer rest for 10-15 minutes between batches. Continuous operation generates heat that accelerates grease breakdown.
Keep it clean. Wipe down the exterior and mixing head after each use. Flour and moisture can work into seams, contaminating grease over time.
Check attachments. Worn or misaligned beaters create uneven loads. Replace bent or damaged attachments promptly.
Store properly. Keep the mixer on a stable surface away from temperature extremes. Garages and basements with high humidity can accelerate seal degradation.
Monitor performance. Note how the mixer handles standard recipes. Changes in sound, speed, or effort signal developing issues. Early intervention through seasonal maintenance guides prevents minor problems from becoming major repairs.
Document service. Mark grease replacement dates on a label inside the rear housing or in a maintenance log. Knowing service history helps track intervals and identify patterns if problems develop.
By treating a KitchenAid mixer as a piece of precision equipment rather than an appliance, users can expect 20-30 years of reliable service. The gearbox, properly maintained, will outlast several motor replacements and countless batches of dough.